Choose your device to get started
What You Need to Know about eSIM installation
1. Ensure your device is eSIM-compatible and carrier-unlocked. Check out our latest list of eSIM-compatible devices.
2. You must have the QR Code on another screen or device or a printed paper to scan it with your phone camera.
3. Ensure that your internet connection remains stable throughout the entire process
4. The QR code or manual installation can only be scanned ONCE.
5. DO NOT remove the eSIM from your device because it cannot be used again.
Installation with QR code

Check your email
Open your email and find the email we sent you with the QR code. If you have not received your code, contact us.

Scan your QR code
Navigate to Settings > select Mobile Data > choose Add Data Plan to scan the code from there.

Follow installation steps
Scan the QR code to start the installation process. Use our guide below for step-by-step configuration.
Steps to install and activate eSIM
- Step 1: On your Pixel device, go to Settings > Network & Internet.
- Step 2: Tap on the ‘+’ beside the SIM/Mobile network.
- Step 3: Select Download a SIM instead.
- Step 4: Select Next.
- Step 5: Your device’s camera will be active on the screen. Scan the QR code using the camera.
- Step 6: Wait for the automatic installation.
- Step 7: Enable your eSIM to start to use.
Notes: These steps may vary slightly depending on your Google Pixel model and Android version. While the wording may differ, the steps are essentially the same.
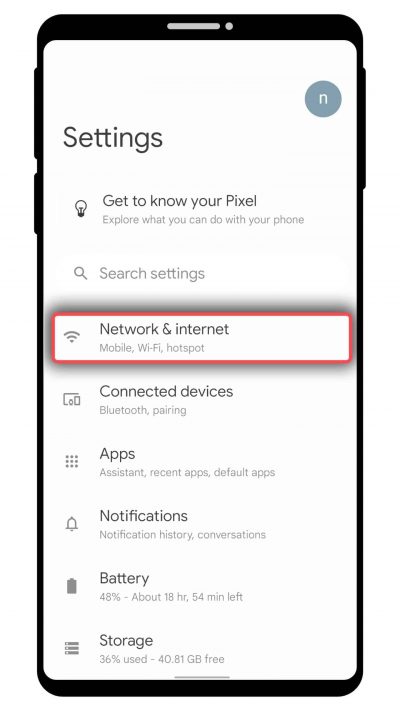
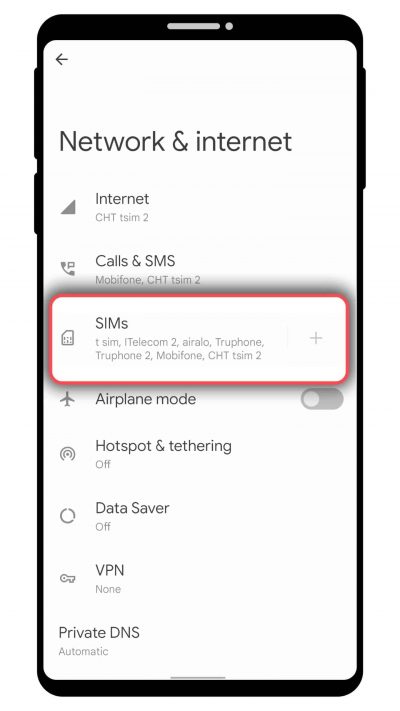
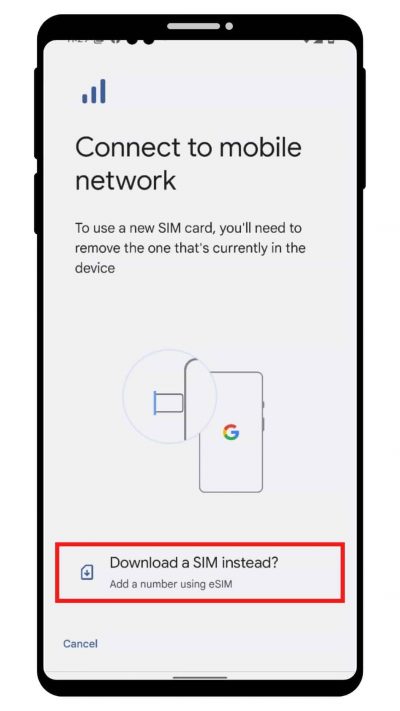
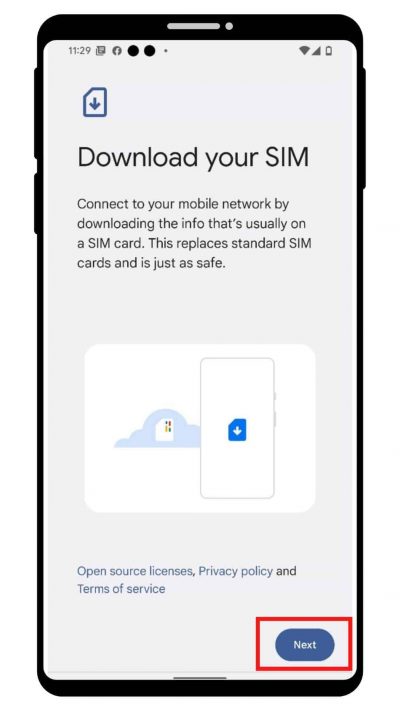
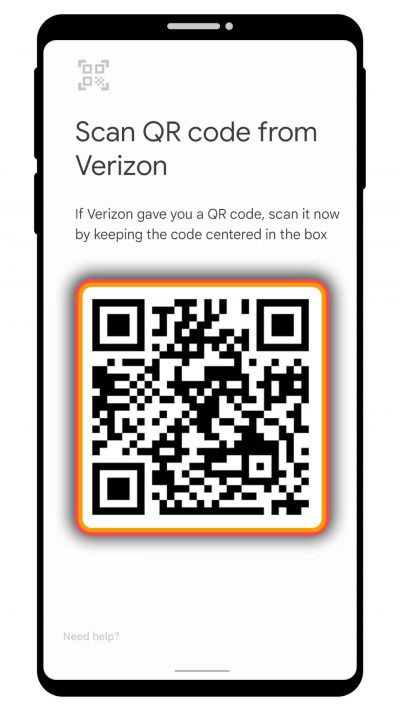
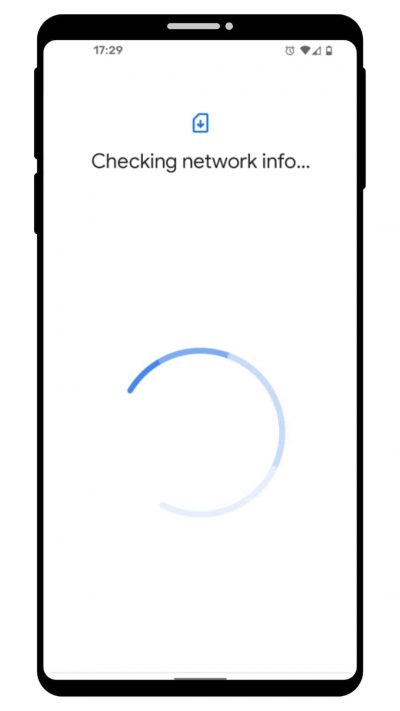
Notes: Detailed guides for each eSIM plan will be sent in the email after purchasing.
Install manually

Check your email
For the SM-DP + address code and the Activation Code. If you have not received your code, contact us.

Opening "Settings"
On your Pixel phone, go to Mobile Data > Add eSIM or Add Data Plan > “Use QR Code” > “Enter it manually” to start the installation.

Follow installation steps
Enter the SM-DP+ address and activation code to start the installation process. Use our guide below for step-by-step configuration.
Steps to install and activate eSIM
- Step 1: On your Google Pixel device, go to Settings > Network & Internet.
- Step 2: Tap on the ‘+’ beside the SIM/Mobile network.
- Step 3: Select Download a SIM instead.
- Step 4: Choose Next to confirm your agreement on policies and terms of service.
- Step 5: Choose the Need help button on the bottom left.
- Step 6: In the line “Having trouble scanning your QR code?”, choose the option Enter it manually.
- Step 7: Enter the eSIM code into the box and choose Continue.
- Step 8: Choose Download to download your eSIM profile.
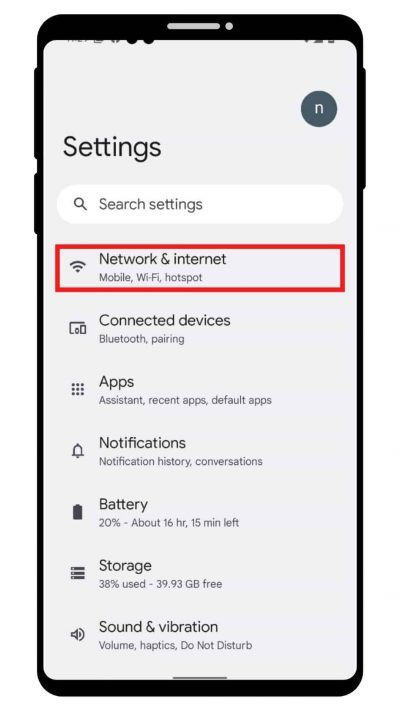
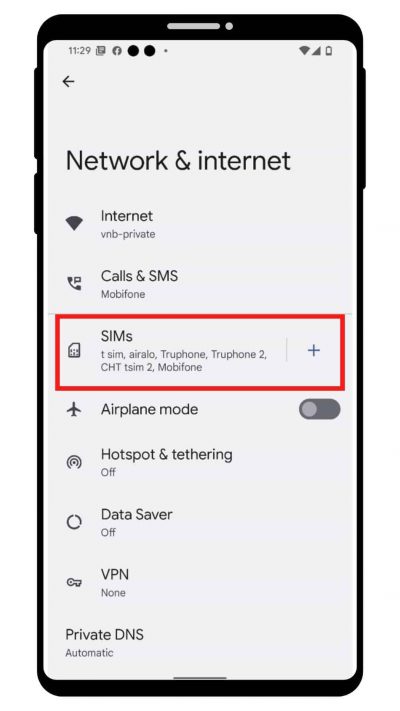

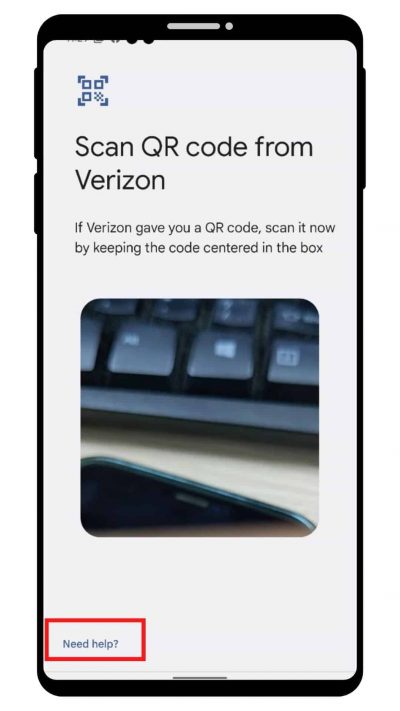
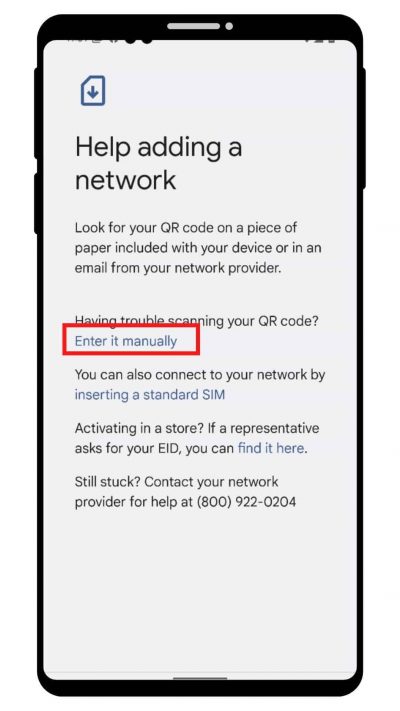
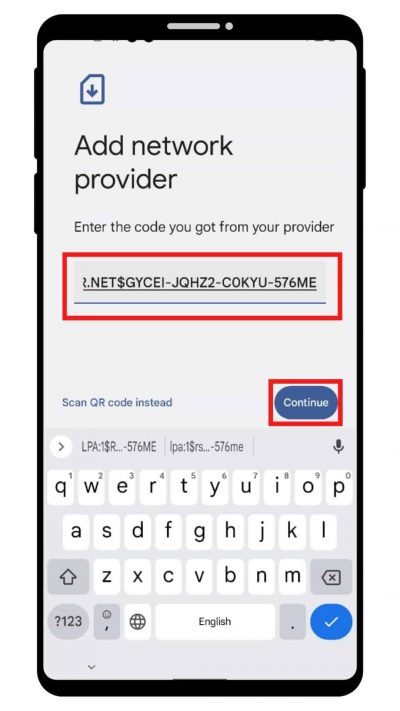
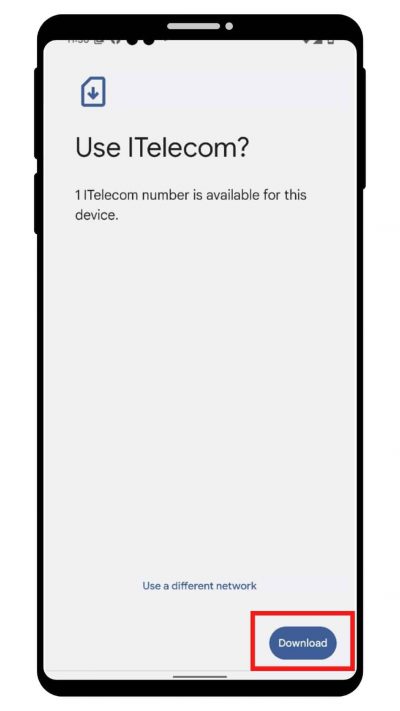
Notes: The detailed guides will be attached in the email.
How to Use your eSIM on Google Pixel
The Indonesia eSIM will automatically activate when installation is complete. To turn on eSIM on Google Pixel and start to use when landing in your destination, you can follow these steps:
- Step 1: Go to Settings > Network & Internet.
- Step 2: Go to SIMs and choose your eSIM plan.
- Step 3: Switch the Use SIM button to activate your eSIM plan.
- Step 4: Confirm the activation.
Congratulations! Your plan has now been installed and is ready to use.
Frequently asked questions
You can use 2 following ways to check:
1. Make sure that there is at least one bar in the signal icon on your device.
2. Go to Settings on your Google Pixel device, select Mobile Data, click on the option that you have labelled before and check that Data Roaming is turned on.
Don’t erase your eSIM as a troubleshooting step, contact us if you need support when having problems with your eSIM.
If you erase your eSIM, you’ll need a new one. Then set up your new eSIM.
Now let’s check out how to remove an eSIM from your device:
- Step 1: Go to Settings > Network & Internet.
- Step 2: Tap on the ‘+’ beside the SIM/Mobile network.
- Step 3: Select the eSIM profile you want to remove.
- Step 4: Choose Erase SIM to remove the eSIM profile.
- Step 5: Confirm Erase.
If you cannot connect to the internet, please adjust your phone APN (access point name) by:
- Step 1: Go to Settings > Network & Internet.
- Step 2: Choose the eSIM profile you want to connect to the internet.
- Step 3: Enable Mobile Data and Roaming.
- Step 4: Choose Access Point Names.
- Step 5: Enter the value sent by your eSIM provider on all APN fields (Cellular/Mobile data, and Personal Hotspot) or a different value if you use eSIM from another provider. The other fields are left blank.
Google Pixel from Pixel 3 models and newer models have dual SIM features with an eSIM and a physical SIM card.
Although you can have multiple eSIM profiles on one Google Pixel (upto 20), it is recommended that you should install 3-4 eSIM on each device. There will only ever be 1 active eSIM profile, though.
