Check your email
Open your email and find the email we sent you with the QR code. If you have not received your code, contact us.

Scan your QR code
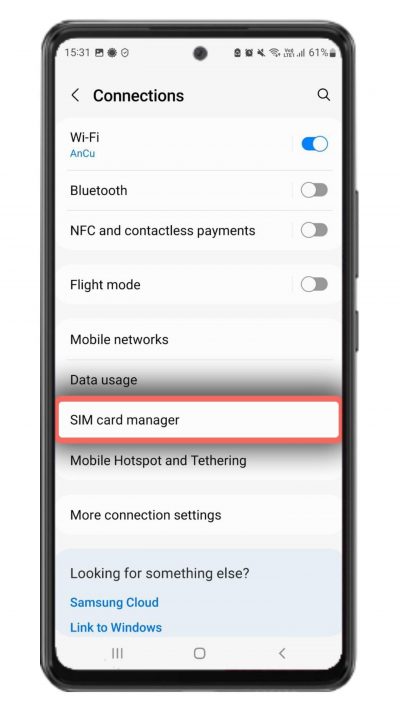
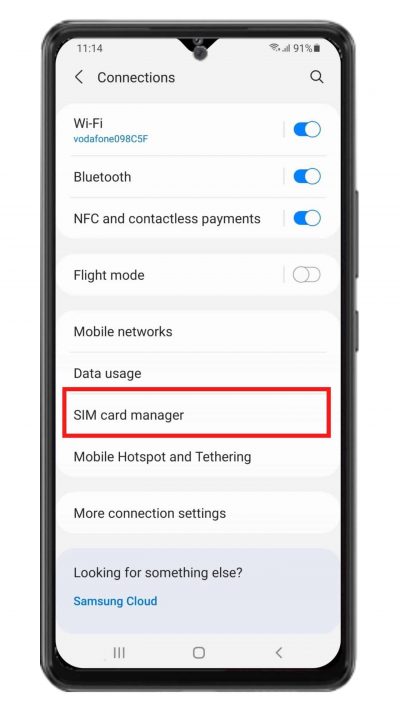
Open your camera and scan the code, or navigate to Settings > Connections > SIM card manager > Add eSIM to start the installation process.

Follow installation steps
Scan the QR code to start the installation process. Use our guide below for step-by-step configuration.

Check your email
For the SM-DP + address code and the Activation Code. If you have not received your code, contact us.
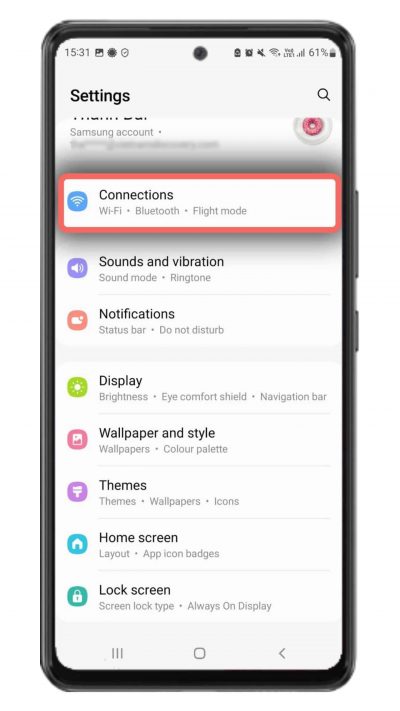
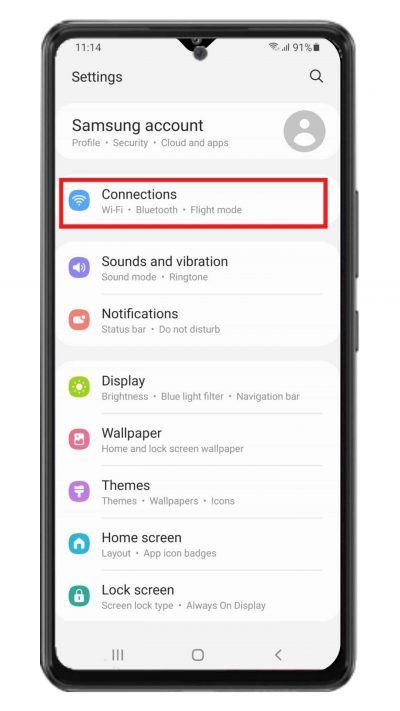
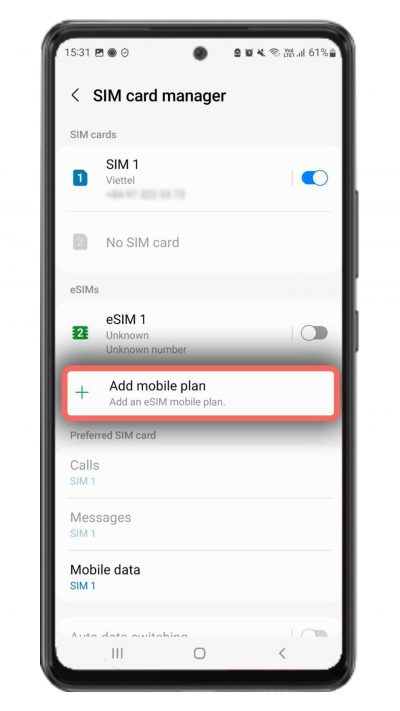
Opening "Settings"
Select Connections and enter SIM card manager, then Add eSIM to start the installation process.
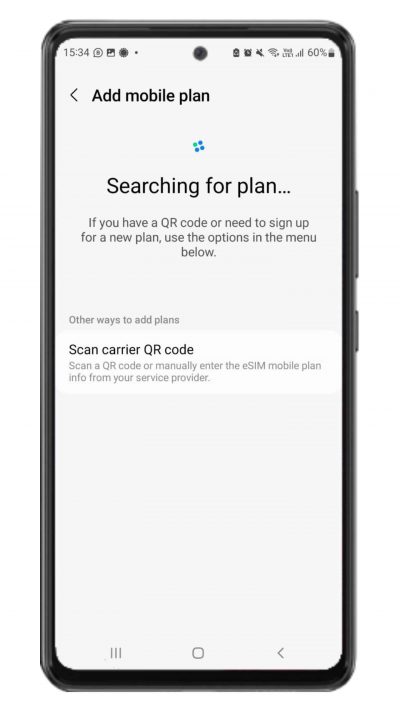
Follow installation steps
Select Scan QR from service provider > Enter activation code. Follow the steps on your device.